
If you’re looking to add more space, light, and value to your home, a rear extension is one of the most popular and effective ways to do it. Whether you want a bigger kitchen, an open-plan family room, or a dedicated dining space that flows into the garden, the possibilities are genuinely exciting — and often more achievable than people think.
In this guide, we’ll walk through the best rear extension design ideas, what to think about before you commit, and how to get the most from your budget. We’ll also cover the planning and design process so you know exactly what to expect from start to finish.
Why a Rear Extension?
Rear extensions work on almost every house type — terraced, semi-detached, detached. They’re discreet (you won’t see them from the street), they connect directly to your garden, and they’re typically the most cost-effective way to add significant floor space.
The most common reason people extend at the rear is to open up the ground floor. The classic Victorian and Edwardian layout — narrow hallway, small separate rooms, cramped kitchen at the back — just doesn’t work for modern family life. A rear extension removes that bottleneck and creates something that actually fits the way you live.
Popular Rear Extension Design Ideas
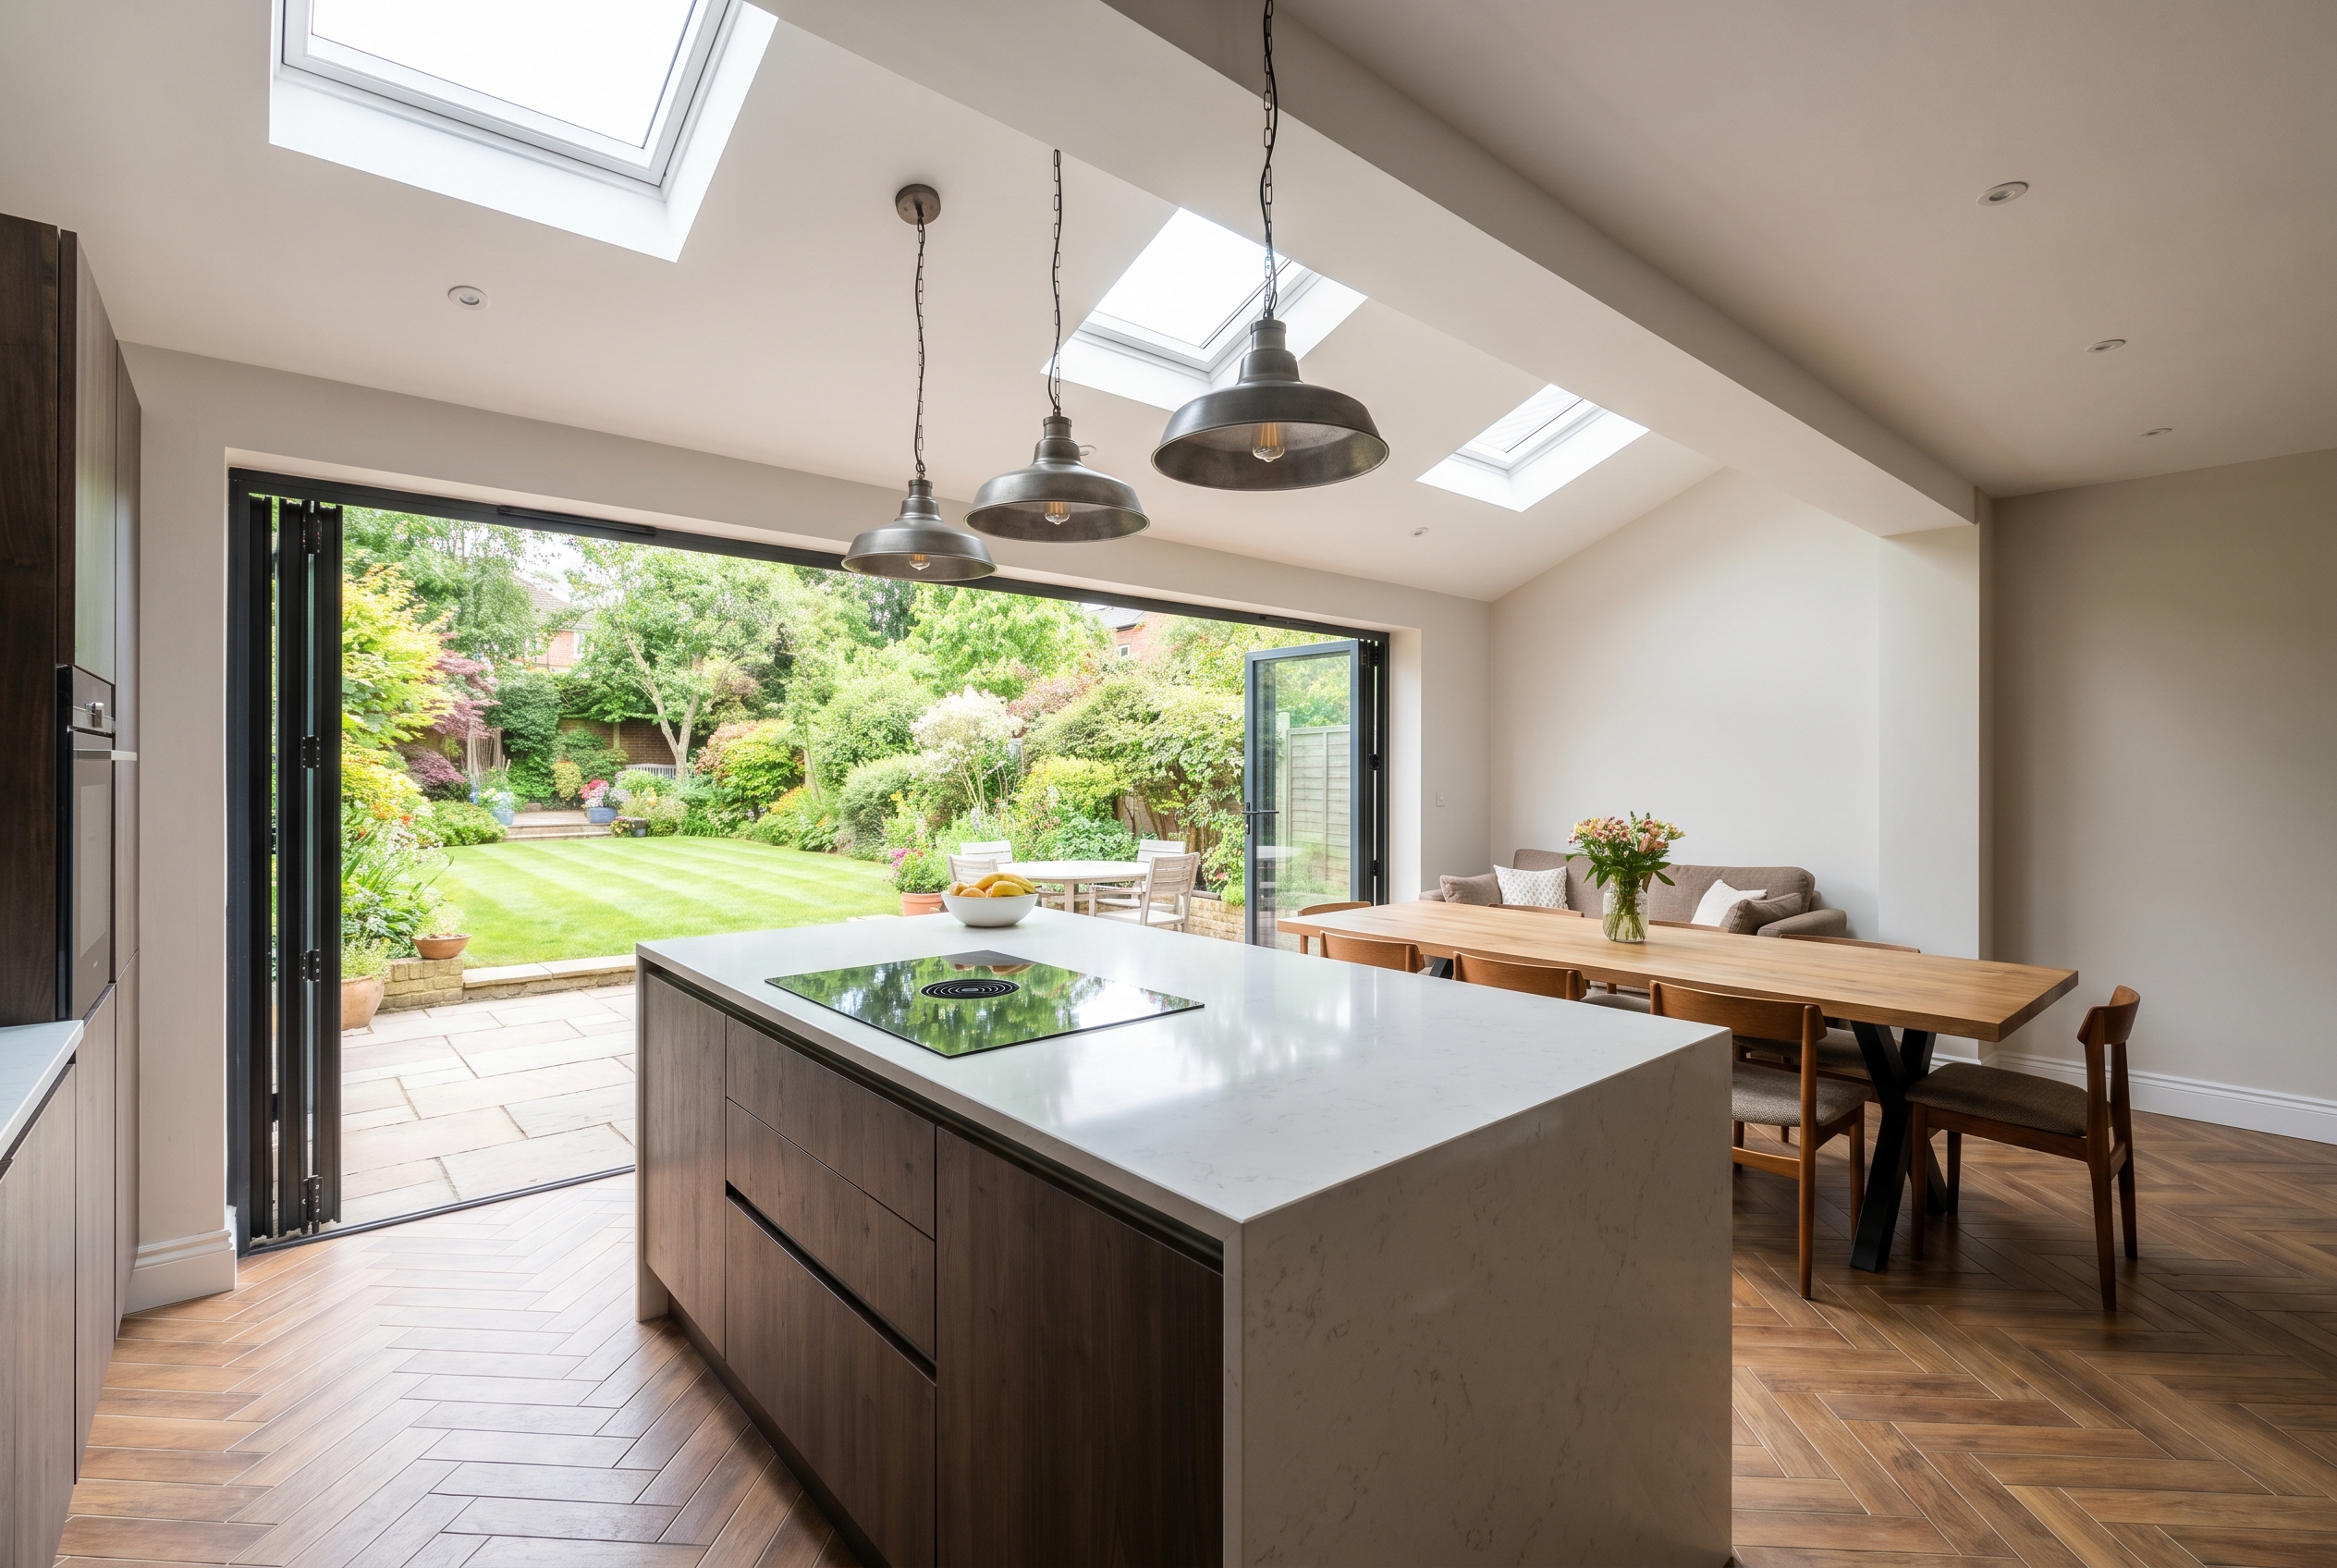
1. Open-Plan Kitchen-Diner
This is the most requested rear extension design by a long stretch. Knocking through the existing kitchen and rear reception room into one large, open-plan space transforms how a home feels. Add bifold or sliding doors across the full back wall and you’ve got a kitchen-diner that opens completely onto the garden — brilliant for families, great for entertaining.
Key design considerations: think about where the island goes, how natural light enters from the south or east, and whether you want an underfloor heating system while the floor is up. These decisions are much cheaper to make at design stage than as afterthoughts.
2. Full-Width Flat Roof Extension
Full-width extensions that span the entire rear of the house make a real architectural statement. A contemporary flat roof with a large rooflight above the seating or dining area creates a sense of space and light that you simply can’t get any other way. The rooflight pours light into the centre of the room — something south-facing glass walls can’t achieve on their own.
Flat roof extensions tend to be slightly more affordable to build than pitched alternatives, and they work well on both modern and traditional properties. The key is getting the insulation and waterproofing right at the outset — something a good building control application will cover.
3. Pitched Roof Rear Extension
If you want your extension to blend seamlessly with the original house, a pitched roof is often the answer. This works especially well on detached houses or where the extension wraps around a side return. A pitched roof can also give you scope for a vaulted ceiling inside — a popular choice for living rooms and dining rooms where that sense of height makes a real difference.
4. Side Return Extension
If you’ve got a narrow alley down the side of your house (common on terraced and semi-detached Victorian and Edwardian homes), a side return infill is worth serious consideration. It takes up otherwise dead space and can add a surprising amount of square footage to your kitchen or living area.
Combining a rear extension with a side return creates an L-shaped footprint that gives you exceptional room sizes on the ground floor — often in the region of 35–45 square metres of additional space.
5. Garden Room / Snug
Not every rear extension needs to create a massive open-plan space. A smaller, more intimate addition at the back of the house — a reading room, snug, or home office — can be just as transformative. Think Crittall-style steel windows, exposed brick or timber cladding, and a cosy feel that’s completely separate from the main living area.
These tend to be smaller projects (under 30m²) and often fall under permitted development, which means no planning permission required.
Do You Need Planning Permission for a Rear Extension?
This is the question most homeowners ask first — and the good news is that many rear extensions don’t need planning permission at all, thanks to permitted development rights.
Under current rules, a single-storey rear extension can be built without planning permission if it doesn’t extend more than 3 metres from the original rear wall (or 4 metres for a detached house). These limits can be doubled under the Prior Approval process — so up to 6 metres for semi-detached and terraced, 8 metres for detached — as long as neighbours are notified and raise no objections.
There are exceptions. If you’re in a Conservation Area, an Area of Outstanding Natural Beauty, or your property is listed, permitted development rights may be restricted or removed entirely. Always check before you build.
If your extension doesn’t fall under permitted development, you’ll need full planning permission. That’s a formal application to your local authority, typically taking 8–10 weeks. We handle this entire process for our clients — from preparing the drawings to submitting and managing the application. You can get a fixed-price quote for the full package at arkiplan.co.uk/houseextensiondrawings.
Rear Extension Design: Key Things to Get Right
Maximise Natural Light
Light is everything in a rear extension. Position your glazing carefully — south and east-facing rears get the best of the morning and midday sun, while west-facing gets the evening light (perfect for an after-work kitchen). Rooflights are one of the most cost-effective ways to flood a room with daylight, especially if you’re restricted on how much rear glazing you can add.
Think About the Flow
The best rear extensions don’t just add a box on the back of the house — they rethink how the whole ground floor works. Where does the cooking happen relative to where the kids are playing? Where do you sit to watch TV? How does the space connect to the garden? These are design decisions, not just building ones, and they’re worth spending time on before anything gets drawn up.
Materials and Finish
Your extension doesn’t have to match the original house — sometimes contrast works brilliantly. Zinc or anthracite aluminium on a flat roof extension against traditional red brick is a popular choice right now. Alternatively, matching brick, tile, or render can create a seamless look that makes the extension feel like it was always there.
If you’re in a Conservation Area or the council is particularly picky about materials, matching is often required. Your planning officer will advise — or if we’re handling your application, we’ll deal with that conversation on your behalf.
Building Regulations
Regardless of whether you need planning permission, any extension will need to comply with Building Regulations. This covers structural integrity, thermal insulation, drainage, electrical safety, and fire safety. You’ll need to submit either a Full Plans application or a Building Notice to your local authority (or an approved inspector) before work begins.
At Arkiplan, we prepare and submit the full Building Regulations application as part of our fixed-price service — so you’re covered end to end. Find out more about what’s included here.
How Much Does a Rear Extension Cost?
Build costs vary significantly by region, spec, and size — but as a rough guide for 2026:
- Small single-storey rear extension (up to 20m²): £40,000–£65,000
- Mid-size single-storey rear extension (20–35m²): £60,000–£90,000
- Larger rear extension or combined side return (35–50m²): £85,000–£130,000
These figures include labour and materials but exclude kitchen fit-out, landscaping, and interior finish. London and the South East will typically come in 15–25% higher than the rest of England and Wales.
On top of build costs, factor in: architectural design drawings, building control fees, and structural engineering calculations. At Arkiplan, our design and documentation service is a single fixed price from day one — you’ll know exactly what you’re paying before anything gets started.
How Long Does a Rear Extension Take?
From the point of instructing a designer, here’s a realistic timeline:
- Design and drawings: 3–6 weeks
- Planning permission (if required): 8–10 weeks
- Finding and appointing a builder: 4–8 weeks
- Build: 10–20 weeks depending on size and specification
Total: roughly 6–9 months from start to finish if planning permission is needed, or 4–6 months if you’re working under permitted development. The design and planning stages are where most delays happen — so getting your drawings done quickly is a real advantage.
Ready to Get Started?
If you’ve got a rear extension idea in your head, the best next step is to get it drawn up properly. At Arkiplan, we do everything in-house — measured surveys using LiDAR 3D scanning, design meetings over Zoom, all drawings, planning applications, structural calculations, and building control submissions, at a fixed price from the start.
No hidden fees. No surprise extras. Just a clear process and a team that handles it all for you. Get a quote today and we’ll tell you exactly what’s involved and what it’ll cost.